

Managing a busy entrance without automation leads to security gaps and slow traffic. Manual checks are often inaccurate and expensive. You can solve this by integrating flap barriers with modern access control.
To integrate flap barriers with access control, you connect the signal output of the controller to the gate’s motherboard. Most systems use a dry contact or Wiegand interface. This setup allows the gate to open automatically once a user is verified by a card, face, or fingerprint.
I have worked on many security projects where the hardware and software did not talk to each other correctly. It is a common problem that creates frustration for everyone. I will explain exactly how to fix this and make your system run smoothly.
What is the problem with the flap barrier?
Broken sensors or slow response times can cause major delays at your entrance. If the system fails, people get stuck, and security is compromised. We need to look at why these failures happen.
The most common problems with flap barriers are infrared sensor misalignment[^1], motor fatigue, and logic errors. Dust can block sensors, causing the gate to stay open. Cheap motors often overheat or fail after high-volume use, leading to costly repairs and downtime.
Issues with Sensor Performance
I find that the most frequent call for help involves the infrared sensors. These sensors are the "eyes" of the gate. They detect when a person is passing through. If the sensors are not aligned perfectly, the gate might think someone is still in the way. This prevents the wings from closing. Sometimes, strong sunlight or bright lobby lights can also interfere with the infrared signal. I always advise cleaning the sensor covers once a week to prevent dust buildup from causing false alarms.
Mechanical Wear and Tear
The motor and the internal gears take a lot of stress. In a busy office, a gate might open and close thousands of times a day. If the internal components are not high-quality, the mechanical parts start to grind. This leads to loud noises and slow wing movement. I have seen many gates fail because the user did not choose a brushless motor system[^2]. Brushless motors last much longer and run much more quietly than older models.
Troubleshooting Common Faults
| Symptom | Common Root Cause | Recommended Action |
|---|---|---|
| Gate does not open | Loose wiring or no signal | Check the dry contact connection |
| Alarm rings constantly | Sensor blockage or tailgating | Clean sensors and check alignment |
| Wings move slowly | Low voltage or motor wear | Check the power supply output |
| Wings do not sync | Communication cable fault | Replace the master-slave sync wire |
Logic and Software Glitches
The control board uses logic to decide when to open and close. Sometimes, the "stay open" time is set too long. This encourages tailgating, where a second person follows the first person through without a valid card. If the logic is too sensitive, the gate might close on a person’s bag. I recommend testing the anti-pinch settings during the setup to find a balance between security and safety.
What are the different types of flap barriers?
Using a gate that is too small or too slow for your crowd will cause a bottleneck. You need to pick the right design for your specific environment. Choosing the wrong type is a waste of money and time.
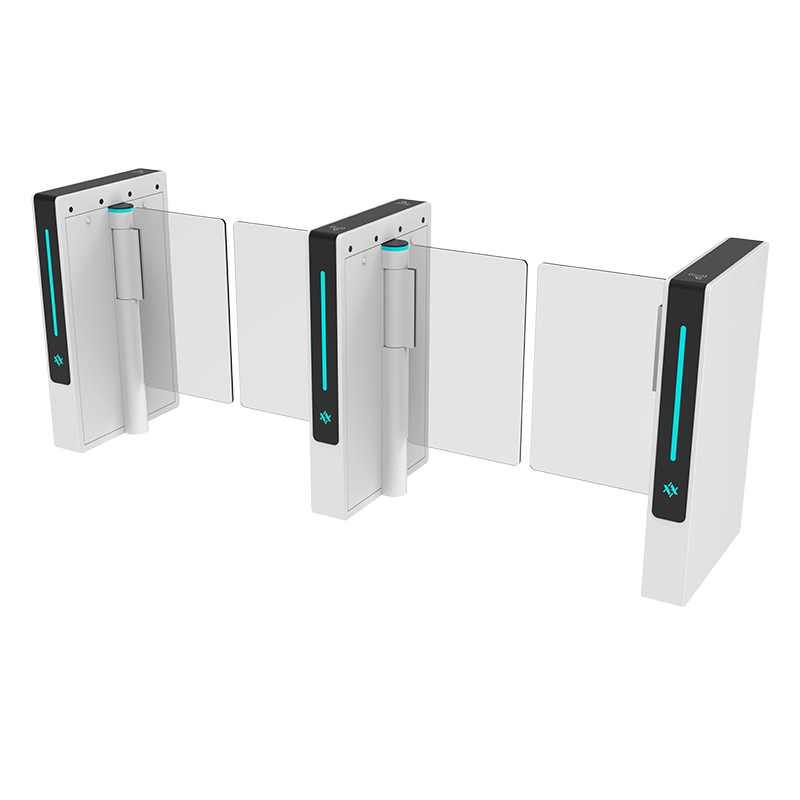
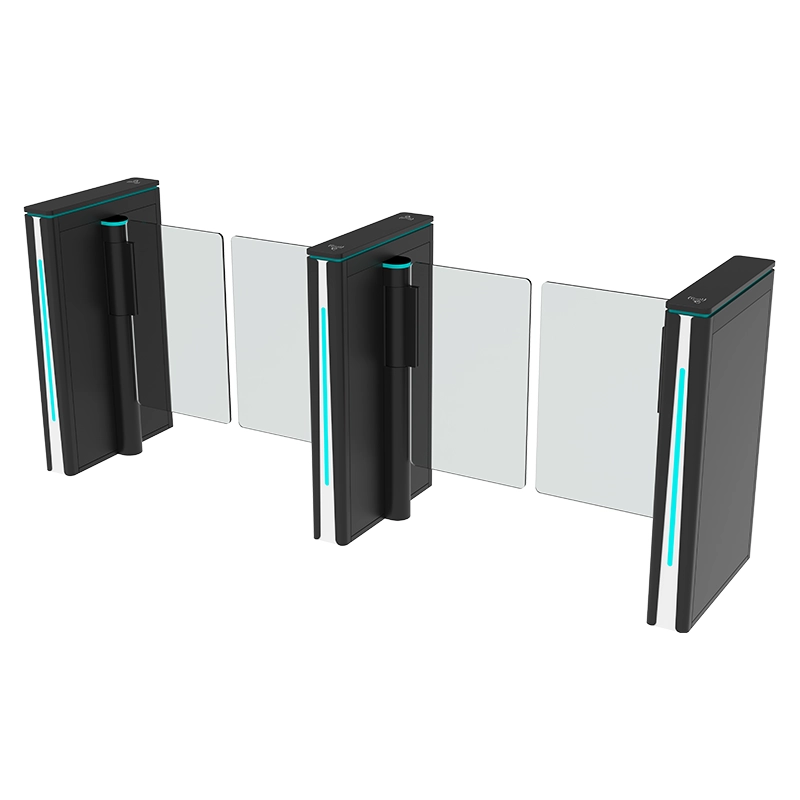
Flap barriers are divided into single-lane, dual-lane, and wide-lane types. Single-lane units work for one path, while dual-lane units have wings on both sides for multiple paths. Some models use retractable wings, while others use folding wings to save space in narrow corridors.
Standard and Slim Designs
In my experience, the look of the gate is just as important as the function for many clients. Standard flap barriers have a wider body, which allows for more robust internal parts and easier maintenance. Slim models are popular in high-end office buildings because they take up less floor space. However, slim models often require more precise engineering because the internal space for the motor and control board is very tight.
Indoor vs. Outdoor Considerations
I often get asked if flap barriers can be used outside. Most standard models are built for indoor use. If you need an outdoor gate, you must look for a model with a high IP rating, such as IP65. This ensures that rain and dust do not enter the cabinet. Outdoor gates also need heaters if you live in a cold climate, or cooling fans for hot areas. Without these, the electronics will fail within a few months.
Lane Configuration Guide
- Single Lane: Requires two cabinets (Master + Slave). This is the basic setup for one entry point.
- Multiple Lanes: Uses two Master/Slave end units and "Dual-wing" units in the middle. This is the most cost-effective way to create three or four lanes.
- Handicapped Lanes: These use wider cabinets and longer flaps. This is necessary for wheelchairs, strollers, or people carrying large luggage.
- Bi-directional Lanes: Most modern gates can be set to allow entry and exit through the same lane, though this requires more complex sensor logic.
Speed and Throughput
The speed of the motor determines how many people can pass through per minute. For high-traffic areas like a subway or a large school, you need a high-speed motor. These gates can handle about 35 to 45 people per minute. If you choose a slow gate for a busy place, people will start to get frustrated and push the wings, which causes mechanical damage. I always look at the peak traffic hours before suggesting a specific model.
How to install a flap barrier?
A poor installation will lead to constant vibration and alignment issues. If the base is not secure, the gate will shake every time it opens. I believe that a good installation starts with a flat floor and clear plans.
To install a flap barrier, you must first fix the cabinet to a level floor using expansion bolts. Then, run the power and signal cables through the floor conduits. Finally, connect the master unit to the slave unit and link your access control device to the trigger ports.
Ground Preparation and Leveling
The most important step is the floor. If the floor is not level, the two cabinets will not face each other perfectly. This means the wings will not line up when they close. I use a laser level to make sure the ground is flat. If it is not, I use metal shims to level the cabinet base. You must also ensure the expansion bolts are drilled deep into the concrete. A gate that wobbles will eventually have loose internal wires.
Wiring and Connectivity
I always separate the high-voltage power lines from the low-voltage signal lines. If you put them in the same pipe, you might get electrical interference. This makes the access control reader act strange. You need to find the "Trigger" or "Open" terminals on the gate’s control board. Usually, you connect the "Normally Open" (NO) and "Common" (COM) wires from your reader to these terminals.
Step-by-Step Installation Check
| Phase | Task | Key Requirement |
|---|---|---|
| 1 | Marking | Measure the lane width precisely (usually 550mm to 600mm) |
| 2 | Drilling | Use a heavy-duty drill for the M12 expansion bolts |
| 3 | Wiring | Use shielded cables for data to prevent signal loss |
| 4 | Syncing | Connect the RS485 or sync wire between the two cabinets |
| 5 | Software | Set the gate opening time in the control board menu |
Testing and Calibration
Once the power is on, do not let people pass through yet. I perform a "burn-in" test. This means I trigger the gate to open and close 50 times in a row. I watch for any lag or unusual noise. I also test the safety sensors by standing in the middle of the lane. The gate should not close on me. Finally, I check the fire alarm integration. The gates must be wired to the building’s fire system so they open automatically during an emergency.
What are the 4 types of flaps?
Choosing the wrong wing material can lead to injuries or frequent replacements. Some materials are beautiful but heavy, while others are light but easy to break. You need to know the difference to make a smart choice.
The four types of flaps are acrylic wings, tempered glass wings, PU soft foam wings, and stainless steel wings. Acrylic is light and cheap. Tempered glass is very strong and looks professional. PU foam is soft to prevent injury. Stainless steel is used for maximum physical security.
Acrylic and Plexiglass
Acrylic is a very common material because it is easy to replace and comes in many colors. It is lightweight, so the motor does not have to work very hard. This usually leads to a longer motor life. However, acrylic can scratch easily if people hit it with bags or keys. Over time, it can look dull. I suggest this for budget-friendly projects where the look is not the top priority.
Tempered Glass
I prefer tempered glass for luxury office buildings and hotels. It stays clear and does not scratch easily. It gives the entrance a high-end feel. But you must remember that glass is heavy. You need a gate with a powerful motor and a "soft stop" feature. If the motor stops too fast, the weight of the glass can cause the whole cabinet to shake. It is also more expensive to replace if it breaks, though tempered glass is very hard to shatter.
Comparing Wing Materials
- Safety Priority: Use PU soft foam. These are perfect for schools because they do not hurt if a child runs into them.
- Visual Priority: Use tempered glass. It looks the most modern and fits well with glass doors and windows.
- Durability Priority: Use stainless steel. These are almost impossible to break and are great for industrial sites.
- Cost Priority: Use acrylic. It is the most affordable option for standard security needs.
PU Foam and Stainless Steel
PU foam wings are a specialized choice. They have a metal frame inside covered by a soft foam exterior. I see these most often in kindergartens and gyms. They are very safe. On the other hand, stainless steel wings are for high-security areas. They do not allow light to pass through and look very intimidating. These are often used in factories or data centers where you want to show that the security is very strict.
My Insights: Seamlessly Integrating Flap Barriers with Access Control Systems
Confused about integrating flap barriers? Streamline your security operations with effective access control integration.
Integrating flap barriers with access control involves connecting RFID or biometric readers to the barrier’s control board using protocols like RS485 or TCP/IP. Ensure compatibility, update software, and test thoroughly to enhance security and performance.
Implementation Steps and Best Practices for Integration
Integration Steps
Hardware Connection: Connect RFID or biometric readers to the barrier’s control board using standard interfaces like RS485, Wiegand, or TCP/IP. This integration allows seamless communication between the access control system and the flap barrier.
Infrastructure Setup: Prepare a level floor with conduits for power (AC 100–240V) and control lines. Secure the units using anchor bolts, ensuring aligned passage widths (550–900mm).
Communication Configuration: Wire power, ground, and communication terminals as per the diagram. Connect access controllers and readers to the barrier’s RS485/Wiegand ports alongside emergency devices.
Key Considerations
System Testing: Power on the system. Configure device settings like ID, motor direction, and sensors. Test flap operations and safety features thoroughly before official use.
Safety Features: Incorporate emergency mode for flap retraction during power failures or fire alarms. Ensure systems support bi-directional flow and high throughput for efficiency.
By following these steps and focusing on compatibility and thorough testing, you ensure a robust and reliable integration of flap barriers with your access control systems, enhancing overall security.
Conclusion
Integrating flap barriers with access control is the best way to secure your building. By choosing the right motor, materials, and installation methods, you can ensure a fast and safe entry for everyone.
](https://aipadaturnstile.com/wp-content/uploads/2025/11/AT107-TC-01.webp)
](https://aipadaturnstile.com/wp-content/uploads/2025/12/vertical-tripod-turnstile.jpg)
](https://aipadaturnstile.com/wp-content/uploads/2025/12/popup-img.jpg)